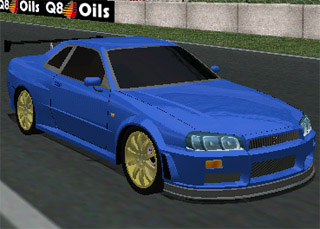
You are almost done. All you have to do now is get this car ready for a download.
First, drive around in-game, then watch the replay. When the camera and the car line up for a Kodak Moment, pause the replay, Hide the Replay Controls, and hit Print Screen.
Then, open your paint program, create a new file (if applicable), and hit Paste.
Crop the picture so the image of the car is in a file no bigger than 320x240. Save it as your car's short name.jpg. You can compress it how much you like, but remember you can sometimes half the file size by dropping from 100% "loss-less" compression to 90% quality. This will now show up in the Carman if you copy it to the Viper Racing\Data folder.
Here's an example:

Once that is done, you now need to make the readme file with installation instructions. Not everyone who downloads the car knows how to use it.
You also need to put the credits for who did what (and if you created the car, you need to put instructions on what you want to be done or not, in case someone else wants to convert this car into another game.
I don't care if you put credit for this tutorial or not.
Here is a template readme file that I use for all my cars.
Just fill out the fields. I use the Class C, B, A, and S Gran Turismo Classifications.
Class C is the slowest, usually unmodified econoboxes or city cars, Class B is tuned econoboxes and slow Sports Cars, Class A is the fast and powerful Sports Cars, and Class S is the race cars and the Supercars (the Viper is Class S).
Put the Readme, Car file, and Car JPG into a ZIP file, using Maximum Compression. If you prefer an archiving program instead of letting Windows Explorer do the job, go get 7-Zip, it's the open source archiving program everyone uses.
If the author gave you permission to convert the car or you are the maker, now you can now upload the car to your website.
Congratulations! You have successfully added a car into Viper Racing!
